Showing posts with label mussel print. Show all posts

Friday, June 14, 2024

Inspired by Summer and the Seashore

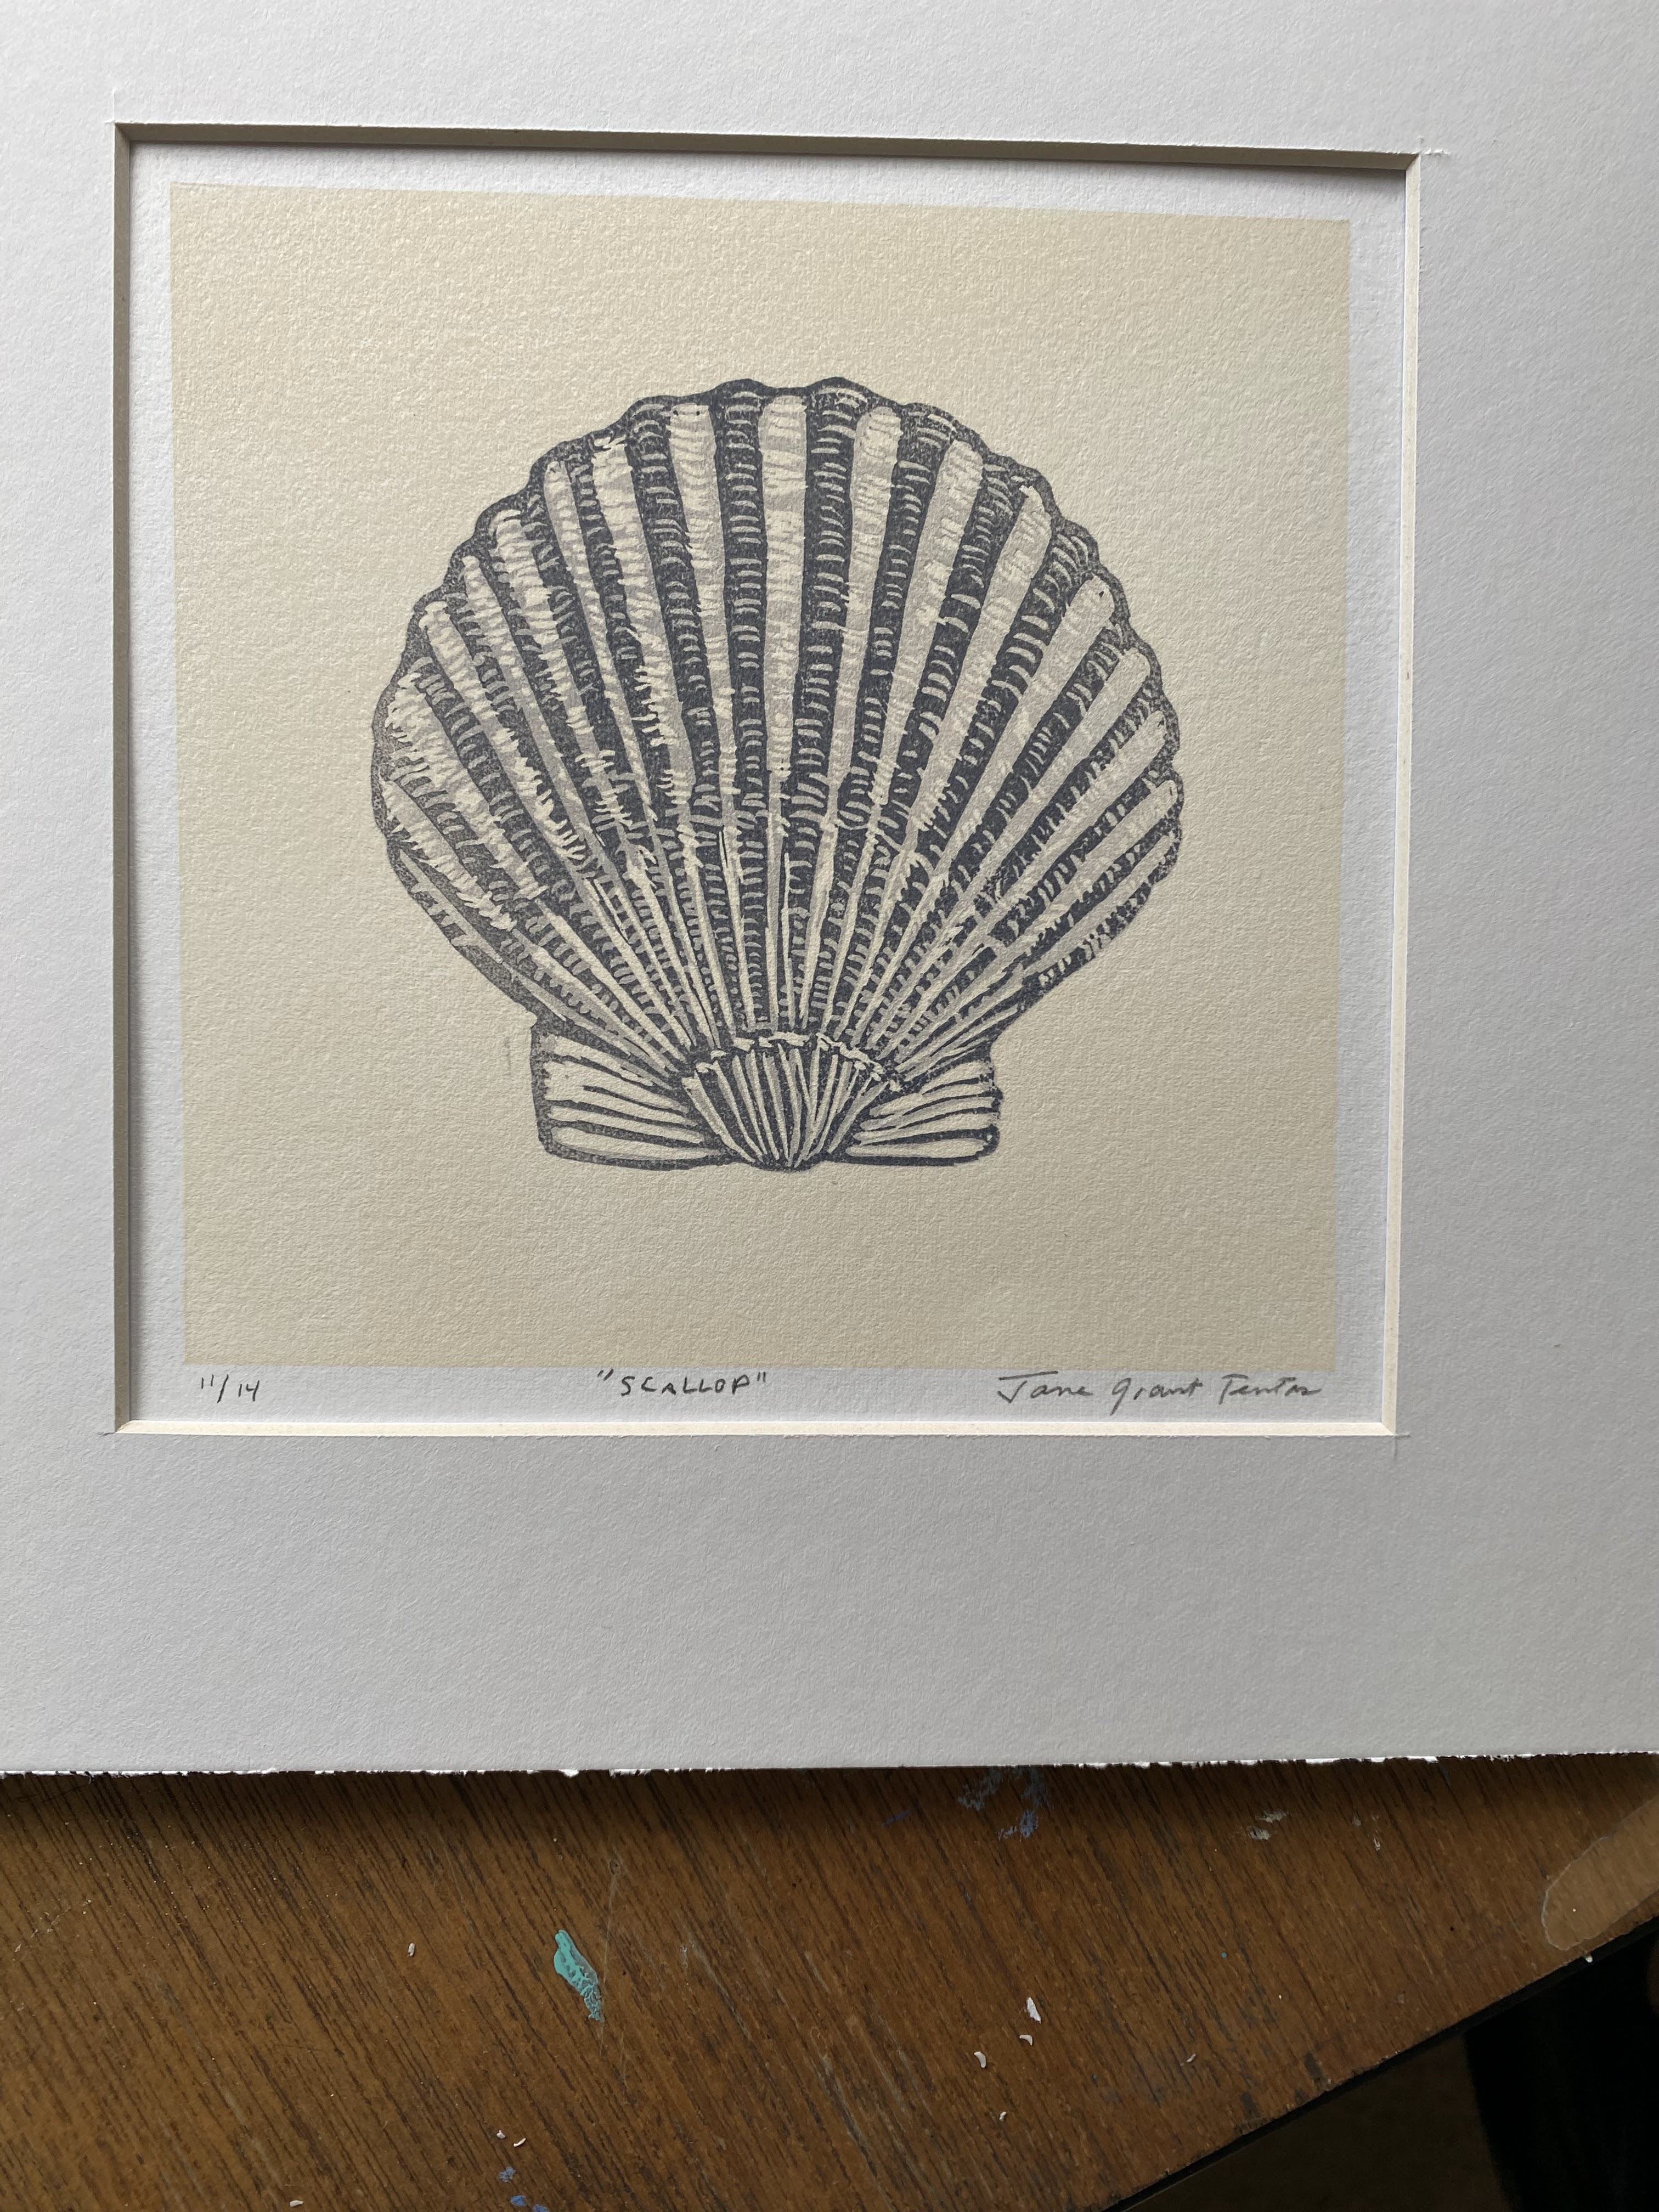
 I've been working on a couple of small prints of seashells. So far I've done a block print of a scallop, and another of the "yin and yang" of a mussel shell.

I'm participating in the Uncommon Art on the Common in Goffstown again this year. It also happens to be the 15th anniversary of the event, and will take place on Saturday August 3rd.

The little block prints that I've been working on are quite small at 5" x 5", and will be matted to fit an 8" x 8". frame. I'd like to complete one more in the series before August 3rd. The question is, what kind of shell will be next. I have a variety of local New England shells that have been saved over the years, and I'm looking over my collection for the right one.


Summer officially arrives on June 20th, and if the forecasters are correct, it looks like it may be a 90 degree scorcher! Stay cool!

Jane

Wednesday, July 25, 2018

The Final Layer!

I printed the final layer of the shell block print today. I carved away a lot of the blue layer, and then printed the final color in a brown hue.


                                                            Close up of the block


Now I have to get ready for the annual "Uncommon Art on the Common" Art Show on August 4th in Goffstown.

Sunday, July 22, 2018

Shells Print continued....

I've been working on the "Shells" print this week, and you'll see the progress since I last posted.
The weather was so pleasant, that I was able to do some of the carving out on the porch. Wiley and I enjoy watching the birds (and squirrels) in the yard while I'm working.


In the images above, I've already printed the first color previously, and carved out the areas that will remain that first color (light gray). I'm also carving out the texture of the background. 

In the image below, here is the layer of darker gray after it has been printed over the first layer.


I've had to do a lot of carving to get the block ready for the next color.


Below are a few variations of the print with the blue-gray layer.


The ink color shows up better in this photo.


I could be done at this stage, but I think I may do another layer. I will have to wait and see how the ink dries. All the various layers of ink, affect the final color. The real trick of making a successful reduction print, is the perfect alignment of the printing paper each time you add a layer. The pins and tabs, as well as a sturdy base to hold the block in place are the keys to matching up the image every time.