Friday, December 29, 2017

Christmas comes and goes...

How quickly the holidays come and go! We celebrated Christmas 2017 in the midst of a snowstorm, and are approaching the New Year in a deep freeze. Fortunately, my sister and her husband were able to navigate my parents' Subaru through the 6" of snow, to get them to my home for Christmas morning brunch. My girls were both here for Christmas Eve, and we had a lovely night together before the big day.
                                                        The night before Christmas

I've been on the Holiday break from work this week, and enjoying some time to catch up on projects, and relax after the busyness of the last few weeks. The area is in the midst of a long stretch of frigid weather. The temperatures haven't risen above 15 degrees, and the wind has made it feel even colder! We've been feeding the birds and squirrels a copious amount of birdseed. I took a picture of a Yellow-bellied Sapsucker that's been hanging around the yard. It looks all fluffed up against the cold.


                                                                   Gold Finches

Aside from errands and a few workouts at the gym, I've been staying warm and toasty at home.


I hope everyone had an enjoyable Christmas! Best wishes for the New Year!

Wednesday, December 6, 2017

Happy 60th Anniversary!

December 7th is a special day for my family, as this year it is the 60th anniversary of my parents' wedding.                                   
                                                   Happy Anniversary Mom and Dad!


Monday, December 4, 2017

Fun Time at the Art show

Last Saturday, I spent the day with fellow teachers selling our wares at a Pop Up Shop. My friend Lori and I set  up our tables with prints, cards, and her felted animals and birds. Others had photographs, batik scarves, ceramics, jewelry, bags, snowmen, and gnomes. It ended up being a fun day with lots of people crowding into Corey's Victorian house to sample yummy snacks, and purchase a few Christmas presents. Here's a couple of pictures of our little corner.


I also finally finished printing the last layer of the sunflower print that I've been working on.


Thursday, November 16, 2017

Sunflowers and Pop-Up Holiday Art Sale

I'm still working on the Sunflower print that I've been posting on previous posts. Here is the latest stage of the print.

I think that there will be one more color after this---the background.

One of my art teacher friends is hosting a Holiday Art Sale at her home on December 2, 2017.
I'm joining other artists for the fun event on 779 Beech Street in Manchester, NH. from 12-4:30.
I will be selling prints and Holiday cards. I guess I'll be busy over Thanksgiving break, putting the final touches on my wares!


Saturday, November 4, 2017

Sunflower Print Layer # 5

Over the last month, I've been working on a linoleum block print of sunflowers, and I've  just printed the fifth color layer. Here are a few images of the process so far.

Yellow, light green, and ochre layers
layer 3
dark green layer #4
printing plate with brown layer #5
lifting off the print 


A drawer full of sunflowers layer #5

Now I will have to carve away the areas that I wish to remain brown, and print layer #6. Another dark green, then the background color should finish it up. 

Saturday, October 7, 2017

Birch Tree Print

Another semester of Printmaking at NHIA has begun, and I'm busy working on a new sunflower print. Only printed one layer so far, and I'm carving away those areas so I can print layer two.

I did finish the Birch tree block print last week. I printed on black Strathmore paper using Akua inks. The black paper underneath gives the inks a bit different tone. I had done another similar design a few years ago for a print exchange, and I didn't have any left. This one is a little bigger using an 8" x 10" EasyCut block.


Same prints-just a little variation in the colors

I'm not anxious to see this view out my window anytime soon. We're having a very humid and mild weekend here. It doesn't feel like October! When you live in New England, they say, "just wait a minute and it will change." 


Saturday, September 30, 2017

Where did September go?

I can't believe a whole month has gone by without a post. I started teaching again at the end of August, and have been out straight with work, printmaking projects, and everything else that has to be done just to keep home and family in some kind of order.

A few fun notes: I have my work in three exhibits right now---the Plymouth State University Alumni Show, the Hopkinton Historical Society Art Show, and through October, the Castle in the Clouds "Finding Place on Paper" Contemporary Poets and Printmakers Exhibit.

Block Island Sunrise is one of the block prints hanging at the Hopkinton Historical Society through December.
I'm working on a couple of new prints that revisit previous subject matter. I have one more layer of inking to do on an updated birch tree theme, and I'm starting another sunflower print.


These were some sunflowers my husband photographed for me, while we were on a day trip to Portsmouth NH. I also grew a few sunflowers in my garden this year. They are starting to droop a bit now, but here are a few images from when they were just opening up.
         

It's rainy and dreary here today, but tomorrow the sun is supposed to come out a again with warmer temperature in the 70s. The weather in New England is unpredictable! Last weekend the temperature was in the humid 90s, and today it was 49 degrees this morning. I'm trying to convince my husband that we may need to turn on the heat later. He says "bundle up."

Enjoy the weekend!!

Wednesday, August 30, 2017

New Prints in the Studio

Ever since I converted Daughter #2's bedroom into my studio, I have been enjoying my new space. Before, I was kind of spread out into several rooms in the house. Now I am able to store most of my materials in one place, and use the area for projects I am working on. I also have a nice view of the back yard! Here's an image of my current printmaking projects in progress...


Wednesday, August 23, 2017

Illustration Friday "Mail"

Something new for Illustration Friday.
Mail
Does anyone get real mail anymore?


Wiley is hanging out with me while I'm working on a new print!

Wednesday, August 2, 2017

Illustration Friday "neighbors"

Just finished my illustration for this week's Illustration Friday prompt, "neighbors."

                  " Neighbors"        

                                          Black Prismacolor pencil, watercolor

How to make a reduction block print

I just finished a new reduction block print, and I thought I'd demonstrate the process. It may seem like a complicated process, but once you see the steps, I think it will make more sense.

These are the materials I use most of the time, as I can print at home without a printing press.

Soft-cut block (flexible, rubbery material, easy to carve, durable)
Rives Lightweight paper
Pins and tabs for registration (Ternes Burton Co.)
cardboard template
Akua Intaglio inks (works great for block prints, cleans up with soap and water)
Brayer- for rolling on the ink evenly
Baren for rubbing back of paper---hands work fine too
Assortment of carving nibs and handle
tracing paper---for transferring image to the block
soft pencil, X-acto knife, ruler
Sharpie marker

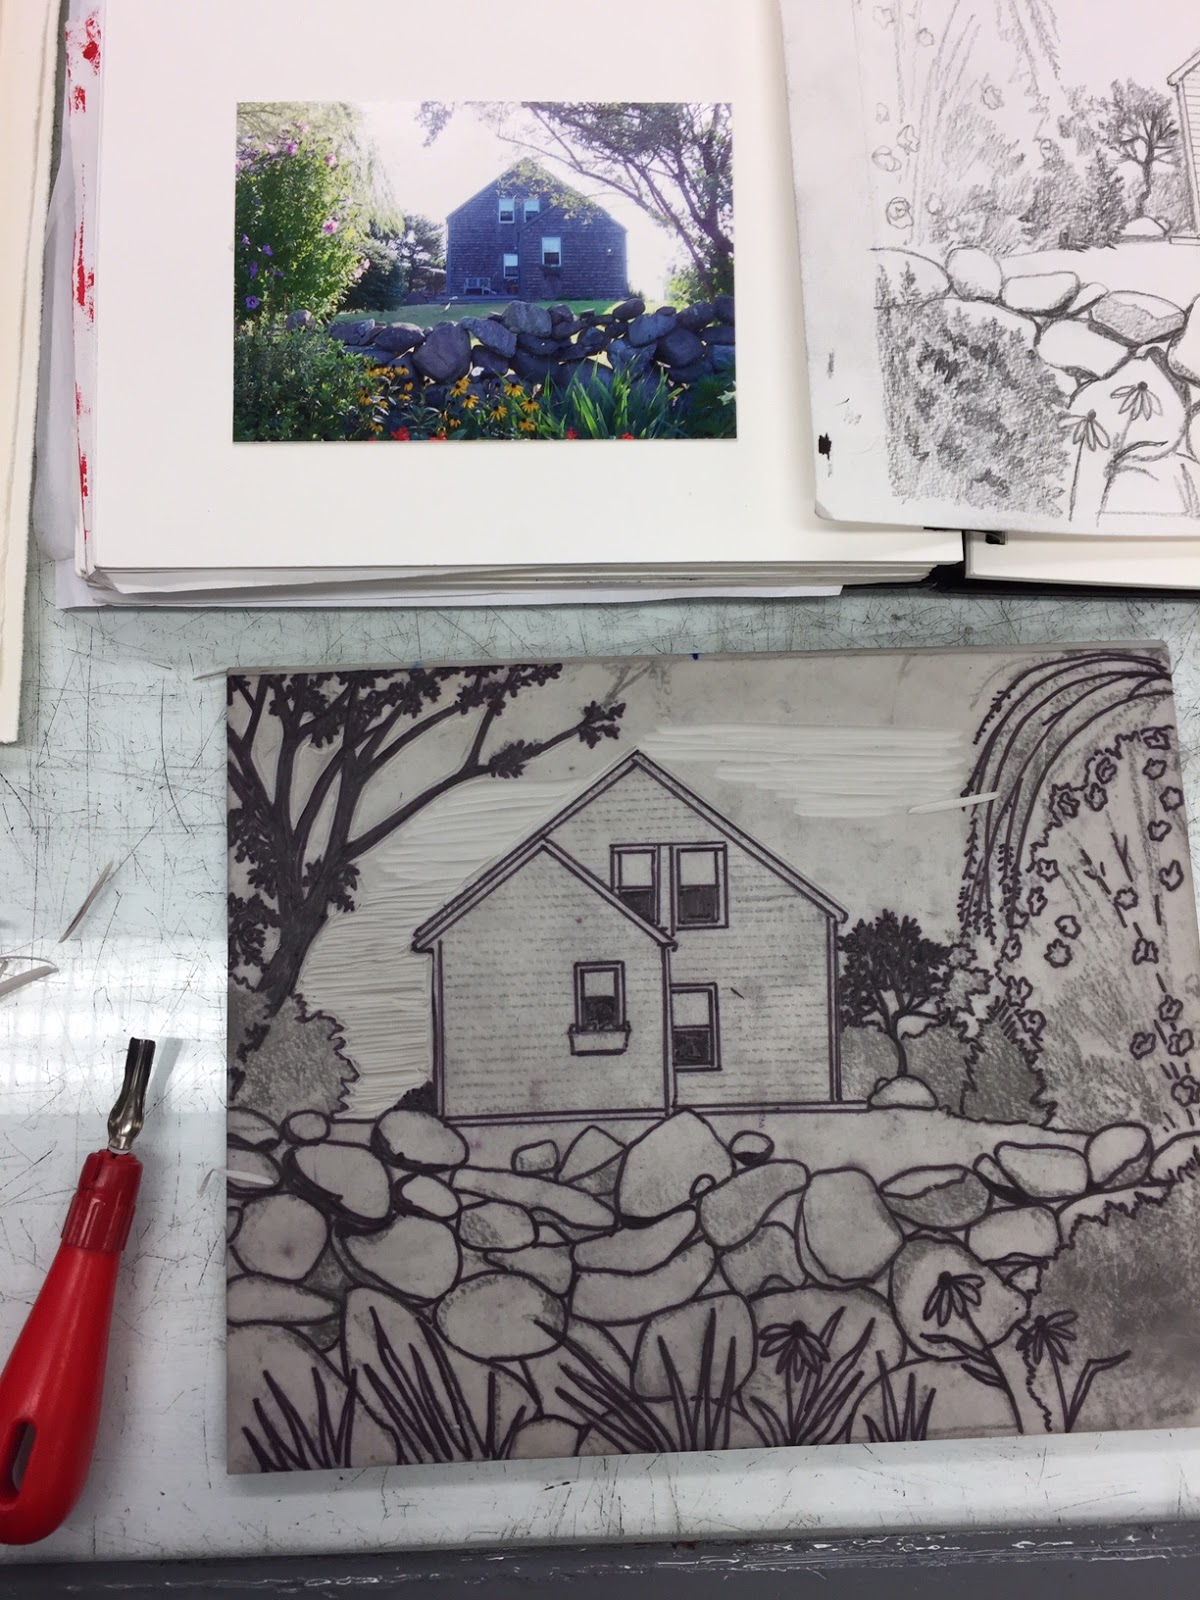
Step 1  Choose your image and block size
Remember that you are going to be layering the colors of inks, so a monochromatic or analogous color scheme work the best. I usually try to print the colors from lightest to darkest.


Draw your image on tracing paper, using a soft pencil. Flip the drawing onto the block with the pencil side down, and gently rub the back of the tracing paper with your hand or a baren. Be careful not to move the paper once you start transferring. When you are done, outline the drawing with a permanent marker, like a Sharpie Fine Line. This will keep your image from rubbing off during the process of carving, printing, and cleaning the block.

Step 2  Pins and Tabs---Registration
This is the easiest way too make sure all the color layers of your prints line up perfectly. Cut up your paper so you have at least a 1-2" border all around the image size. Decide on the number of prints that you want in your edition. I usually do at least 12.

Lay your block onto a piece of cardboard or mat board that is larger than your block size, and trace around the block. Cut out the area inside the lines with an X-acto knife and ruler, and make sure your block fits securely into the space. Attach the pins to the cardboard with tape. One by one, set each piece of paper over the block, and line up the tabs with the pins. Tape the tabs onto the paper.

Step 3  The first color

If you want to leave any areas white (the color of the paper), cut away those white areas with your carving tool first.

Place your block into the cardboard template, and mix up your first color. I use a piece of thick plastic to mix my inks. I use small scraps of mat board to stir up the Akua inks throughly. You can also use Speedball block printing inks for this process, but they tend to dry very quickly.

Using a brayer, roll the ink evenly onto your block. Connect your pins onto the tabs, and lay your paper down onto the inked block. Rub the back of the paper with a baren or your palm. Continue inking and printing until you have finished your first color.

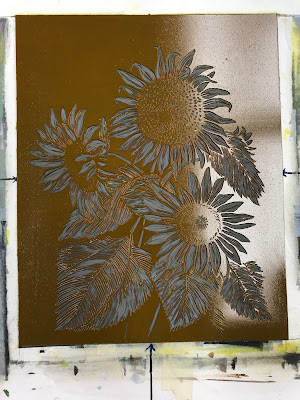
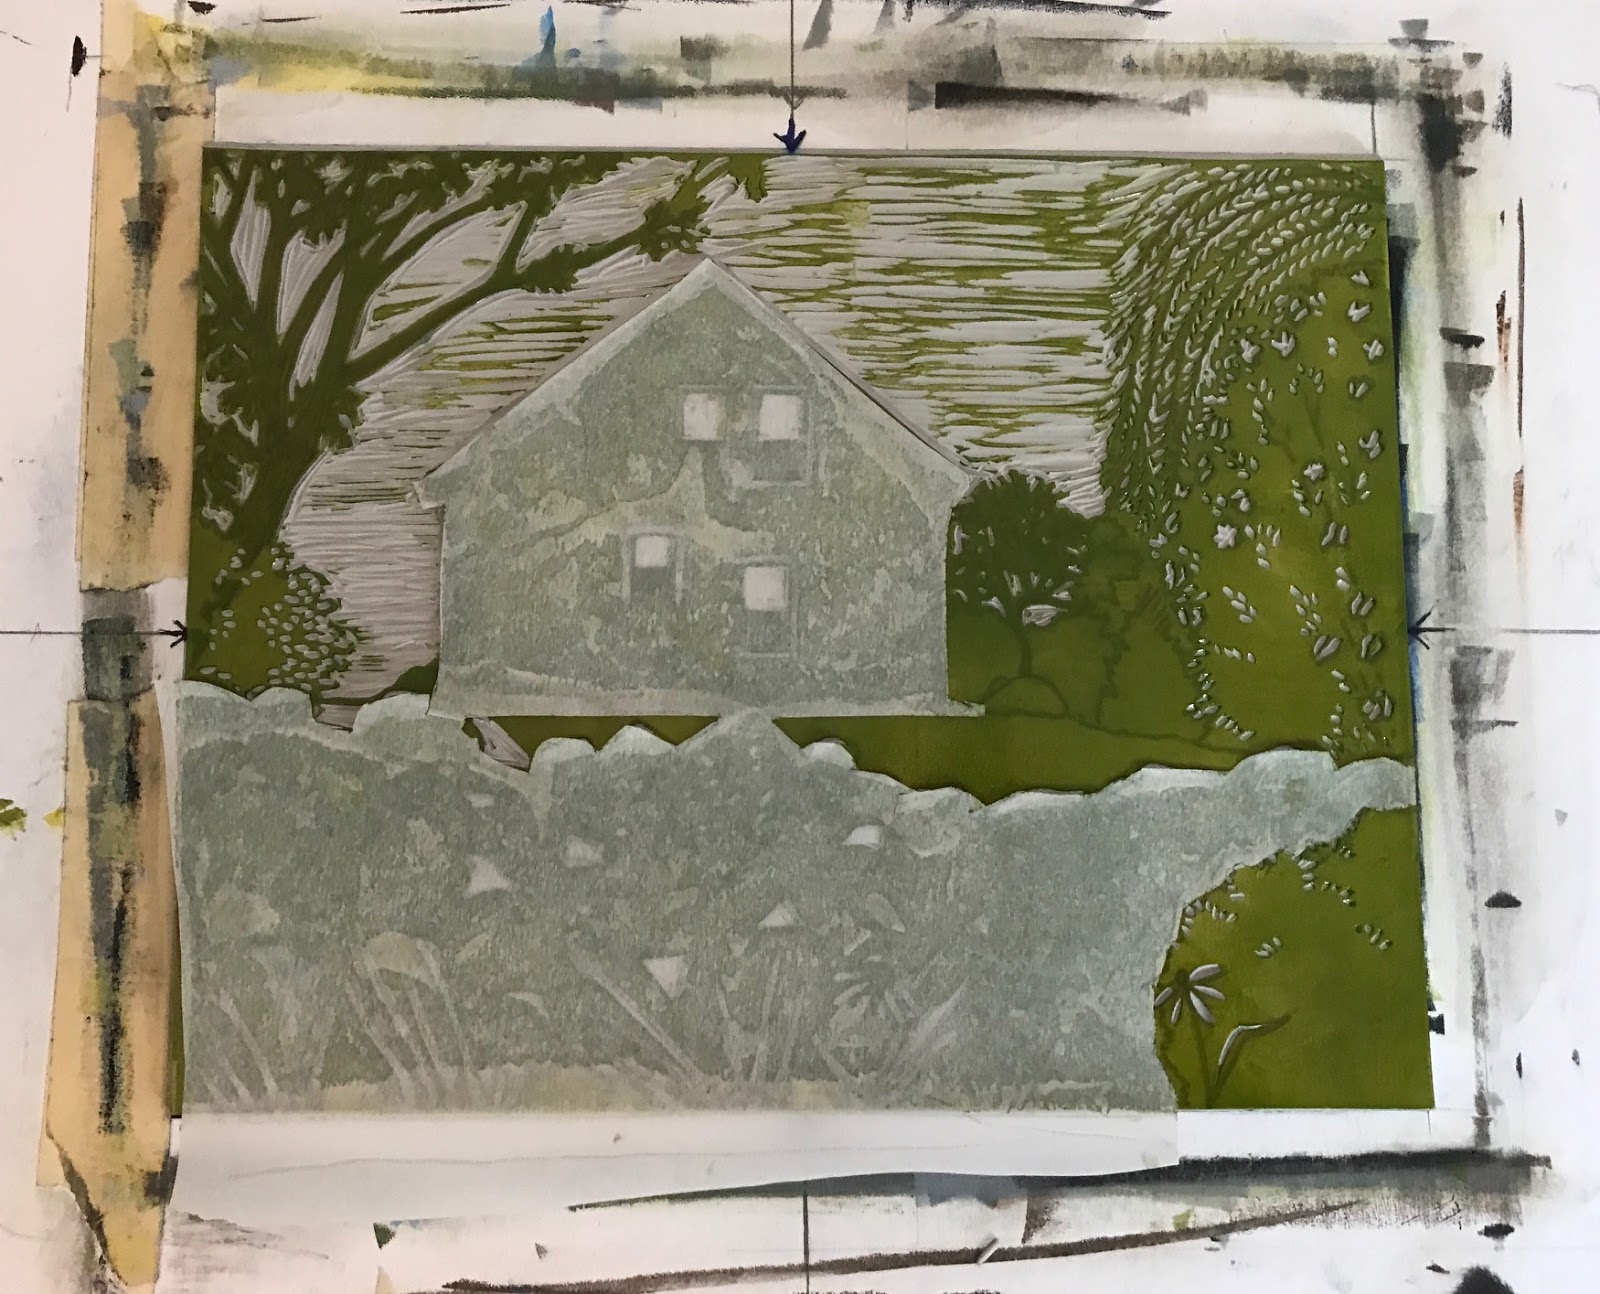
Step 4 Carve away the areas on your block that you wish to remain the first color. Mix up the next color, and print the second layer over the first. Sometimes I will create a blend by putting two colors side by side on my brayer, and rolling them carefully onto the block.


In the above image, I have printed 2 layers---a light green first, and a blend of light purple and gray.
The sky area was cut away before I did the first color, leaving it the white of the paper.

Continue printing and carving away until your last color is done.


Just to make this more confusing, on this layer of green, I made a parchment paper stencil to block off the gray house and stone wall areas, so that the gray would not get any green on it. Each time I inked the block, I would lay the stencil back down.


Here is what the prints looked like at this stage.


                                                    Printing the darker green layer

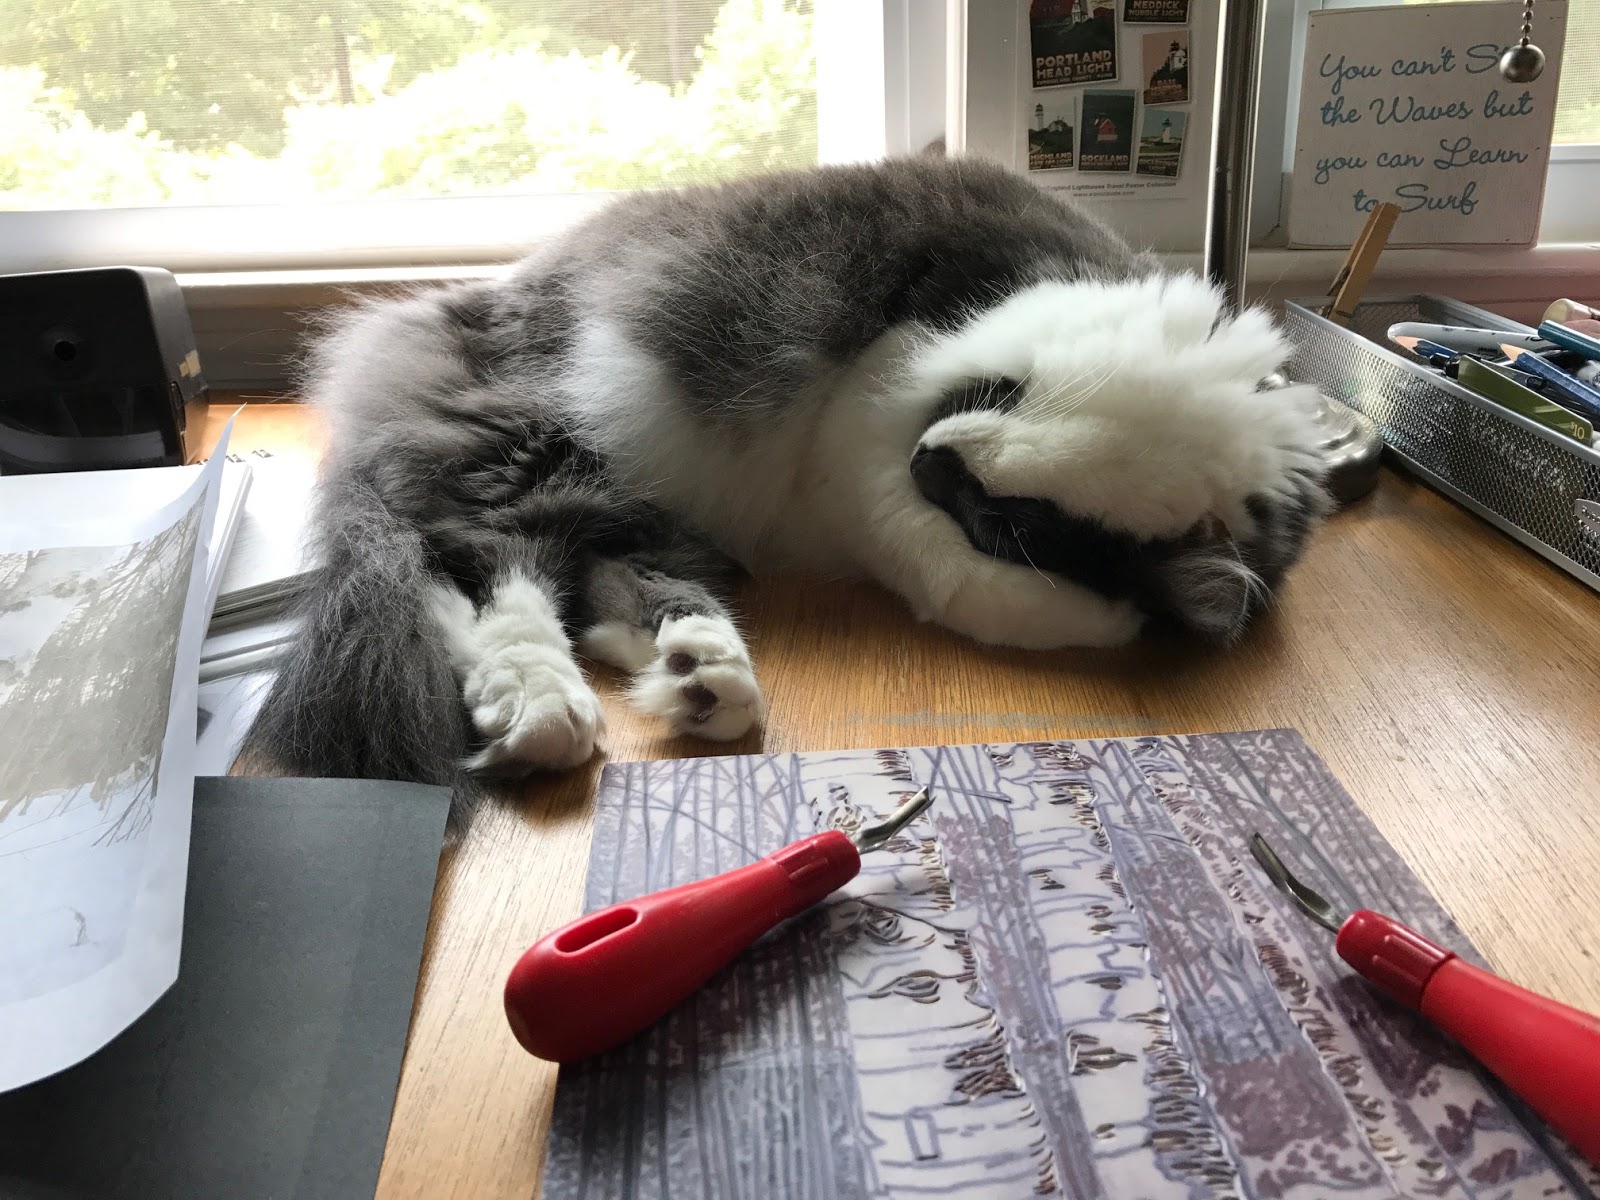
                                                          Carving the final layer
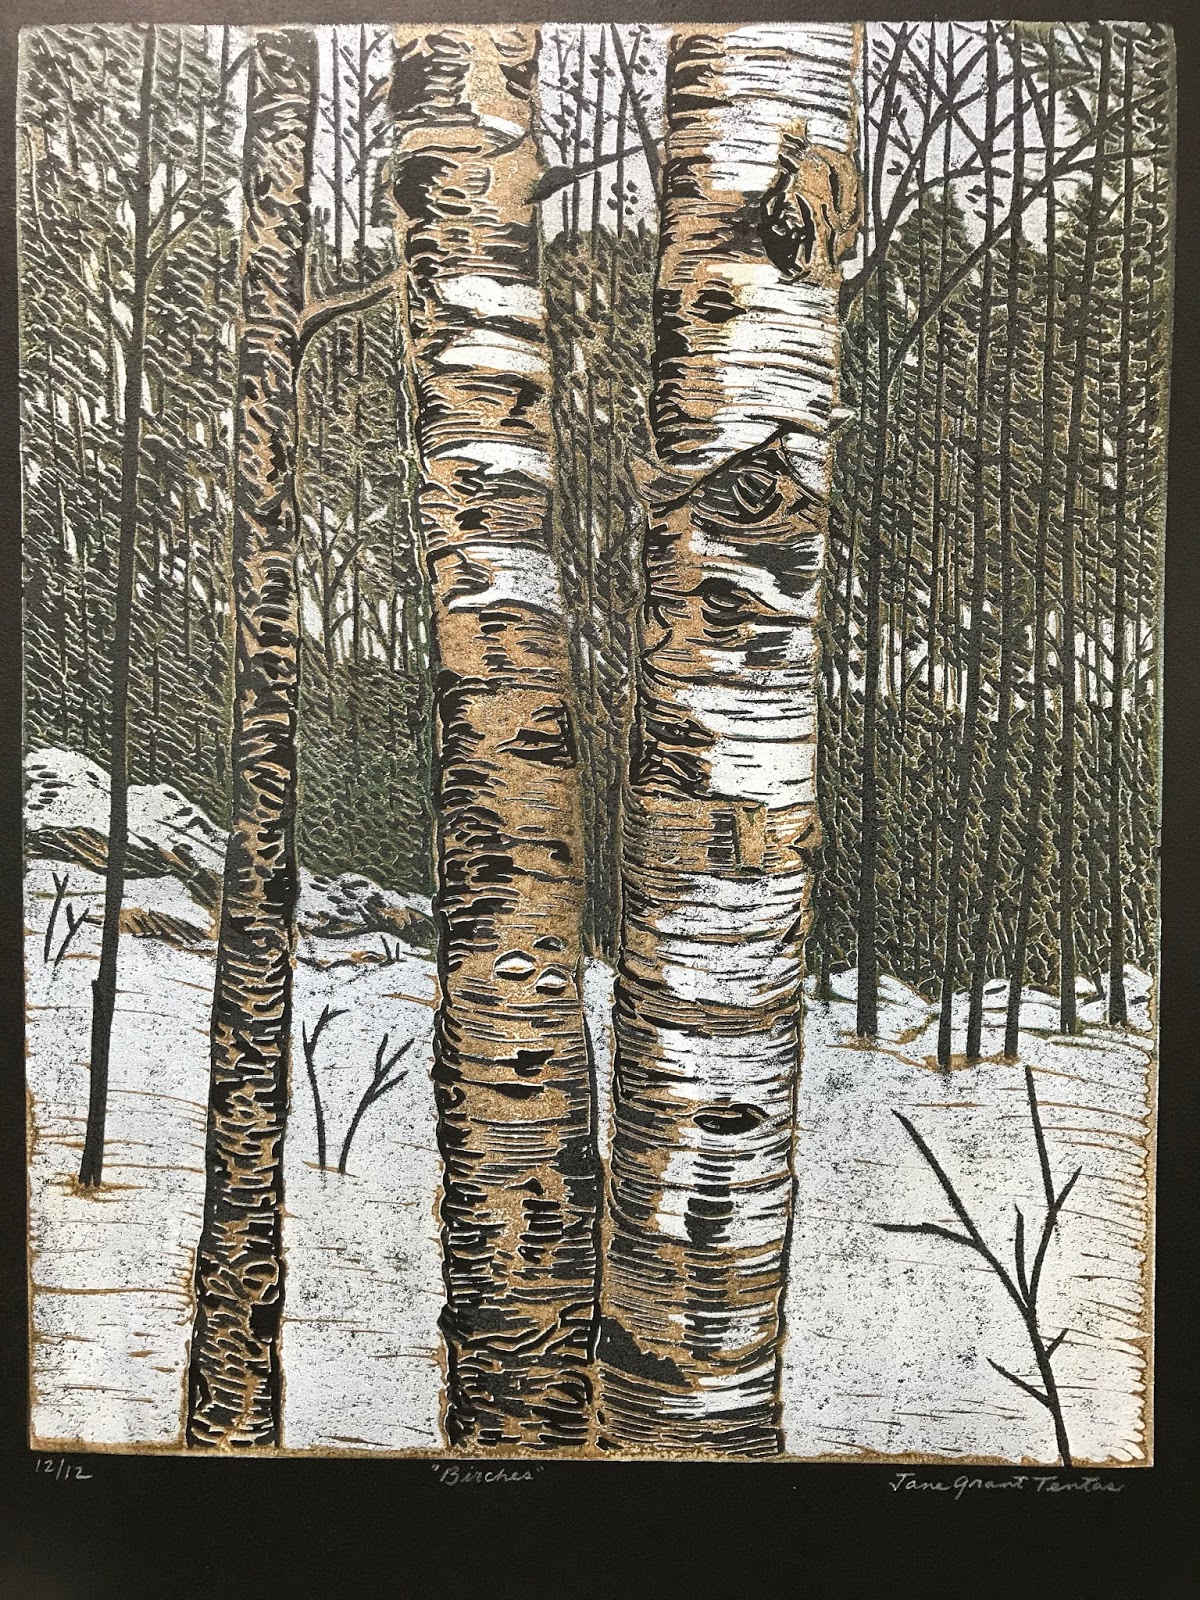

                                                                The finished image


Hanging the prints up to dry. You can also see the cardboard template that the plate is resting in, as well as the metal pins, and the plastic tabs on each print.

When I first started experimenting with reduction block printing, I kept it really simple--2 or 3 colors at most. I worked with small blocks, and didn't use pins and tabs for registration. I just laid the little block on top of the previous color. That's a fun and easy way to try this technique!


Thursday, July 27, 2017

Sailor Mouse

Here is a quick sketch for this week's Illustration Friday topic, "sailor." I'm planning on adding watercolor to the drawing, but would like to meet the deadline for posting on the IF site.

"sailor" black Prismacolor   7" x 10"

Tuesday, July 18, 2017

Summertime Fun!

I've been enjoying my summer vacation, and ignoring my blog. Here are a few images from my recent trip to Maine.

Sunset at Drake's Island Beach jetty, Wells, Maine


 Marginal Way in Ogunquit


Kennebunkport Harbor


The buoys I painted for my friend's new beach house


A quick sandpiper block print


 On the last day, we squeezed in a few hours of beach-combing at the lovely Goose Neck Beach, where I found a sand dollar and other treasures. Good bye Maine!


Wednesday, June 21, 2017

Dad's Day

Enjoyed having my parents up to our house for Father's Day. My sister and my girls were also able to be there, and we had a delicious lunch and a fun time together. Here is the card I made for my dad.


I have lots of happy memories of fun times with my dad. Our family did a lot of outdoor activities when we were growing up--camping, hiking, going to the beach. I am blessed!

Tuesday, June 13, 2017

"Skate" Illustration Friday

It's been a busy time as the current school year winds down. Final exams and major room cleaning have kept me occupied this week! I managed to squeeze in a little time to draw a piece for this week's Illustration Friday prompt, "skate." I used to enjoy roller skating when I was a child. We had strap-on skates that didn't allow for the smoothest ride, but were fun to cruising up and down the street, although we didn't wear helmets back in the day! Fortunately I survived without major damage!


Castle in the Clouds Art Show

I was excited to be invited to show three prints at the Castle in the Clouds, "Finding Place on Paper" exhibit. It was also exciting to see that they used one of my prints on their promotional postcard. It's the one on the left. The show runs through October 22, so if anyone is heading up that way, I hope you'll get to see it.


Thursday, May 25, 2017

Student Art Work

I thought I would post a few examples of my students' work. The school year is coming to a close, and we have been displaying a lot of their art work. Here are a few examples:

watercolor


                             Pastel  landscapes in a glassed-in case (sorry about the reflections)

                                          The original photo and the finished pastel drawing
colored pencil drawing (trompe l'oeil style)

These are from my Drawing 1 classes. I have them everyday for a full school year, and it's always amazing how their skills progress. The top photo was done by a senior in the AP Studio Art class.